You pick up the bag. Your dog immediately appears from another room.
You haven’t even opened it yet.
Sound familiar? There’s something almost magical about peanut butter dog treats — and if you’ve ever wondered why your dog goes absolutely wild for them, you’re not alone. If you’ve also wondered whether you could make something healthier at home without spending an hour in the kitchen, this article is for you.
These easy 4 ingredient dog treats with peanut butter are exactly what they sound like. Four ingredients. Simple steps. And a dog who will make you feel like the greatest pet parent alive. (If you’ve ever been puzzled by why your dog skips regular meals but goes crazy for treats, you’ll want to keep reading.)
Let’s get baking.
What Makes These 4 Ingredient Peanut Butter Dog Treats So Irresistible?
Dogs have roughly 1,700 taste buds compared to a human’s 9,000. However, their sense of smell is 10,000 to 100,000 times more powerful than ours. Peanut butter’s rich, fatty aroma hits their olfactory system like a spotlight — it’s basically catnip, but for dogs.
Additionally, these treats win because they combine four powerhouse ingredients:
- Rolled oats — gentle on digestion, naturally filling
- Ripe banana — naturally sweet, packed with potassium and vitamin B6
- Peanut butter — high in protein and healthy fats (the good kind)
- Egg — binds the treat together and adds protein
Each ingredient serves a purpose. None are filler. That’s exactly why dogs can’t resist them.
According to the American Kennel Club, peanut butter is safe for dogs in moderation and provides a good source of protein, healthy fats, vitamins B and E, and niacin.
You can also learn more about whether dogs can safely eat bananas before adding them to your treat-making routine.
Are These Ingredients Safe for Your Dog? (Read This First)
Before you start mixing, take two minutes to review this. Ingredient safety is not optional — and it’s where most homemade treat recipes fall short.
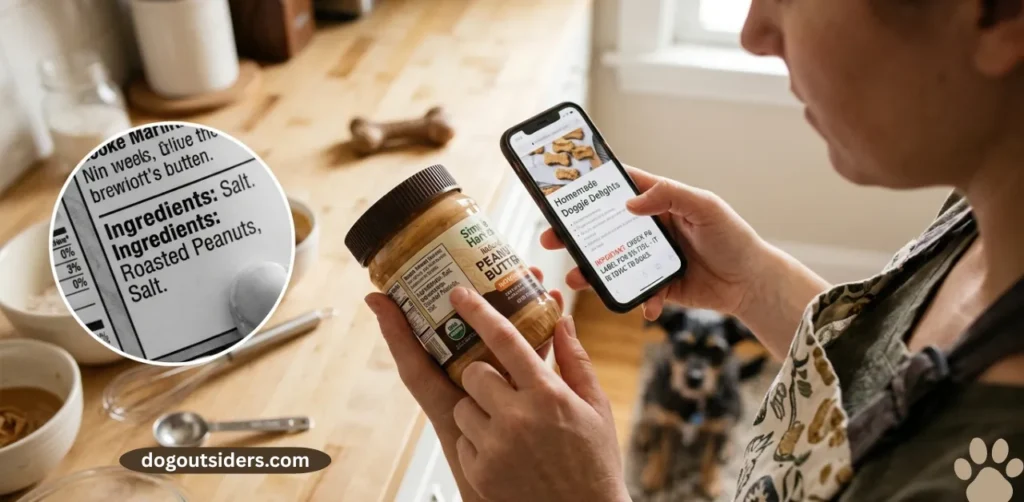
Peanut Butter: What to Look For
The biggest risk with peanut butter is xylitol — an artificial sweetener that is highly toxic to dogs. Even a small amount can cause dangerously low blood sugar, liver failure, and in severe cases, death. (Source: PetMD)
Safe peanut butter brands (as of 2025):
- Jif Natural
- Smucker’s Natural
- 365 Whole Foods Organic Peanut Butter
- Adams Natural Peanut Butter
Always avoid:
- Any brand listing “xylitol,” “birch sugar,” or “sugar alcohol” in ingredients
- “Lite,” “diet,” or “low-sugar” versions — these are the most likely to contain xylitol
Oats: Safe and Gentle
Rolled oats are generally safe for dogs. However, use plain, unflavored oats only. Avoid instant oat packets, which often contain added sugar and artificial flavoring.
Banana: Healthy in Moderation
Bananas are safe for dogs and a great natural sweetener. One ripe banana per batch is the right amount — more than that adds too much sugar. Wondering about other foods? Check out whether broccoli is a safe addition to your dog’s diet while you’re building your knowledge base.
Egg: A Binding Powerhouse
Eggs are an excellent protein source for dogs. Use fully cooked eggs in baked versions. If you choose the no-bake version, consider substituting with a flax egg (1 tablespoon ground flaxseed + 3 tablespoons water) for safety.
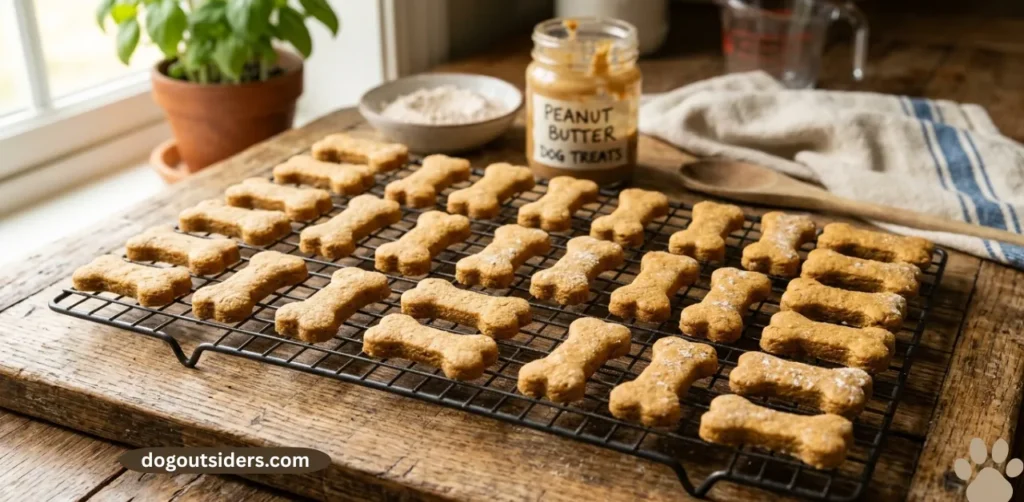
Your Dog Won’t Stop Eating These Easy 4 Ingredient Dog Treats — The Full Recipe
Here’s everything you need. No fancy equipment. No culinary degree.
Yield: Approximately 20–30 treats (depending on cutter size)
Prep time: 10 minutes
Bake time: 20–25 minutes
Total time: ~35 minutes
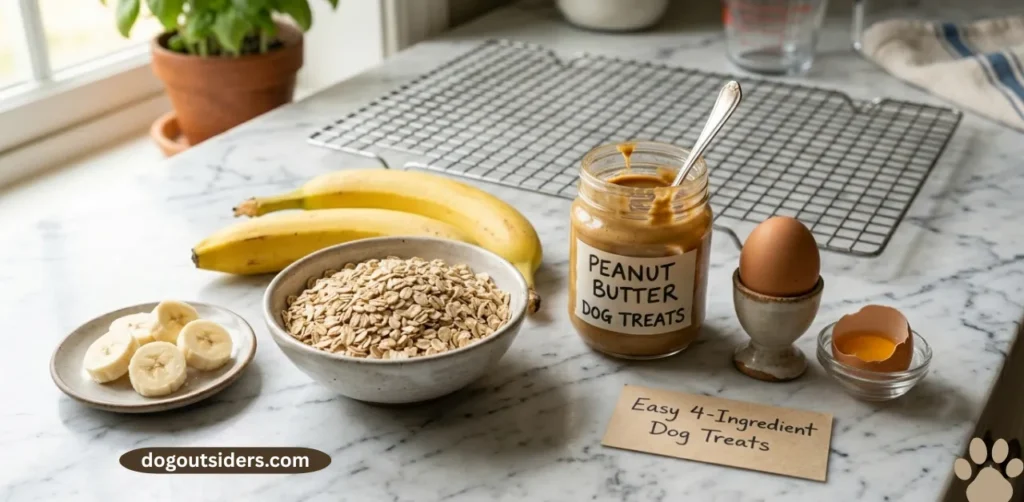
Ingredients
- 2 cups rolled oats (or oat flour)
- 1 ripe banana, mashed
- ½ cup xylitol-free peanut butter
- 1 egg
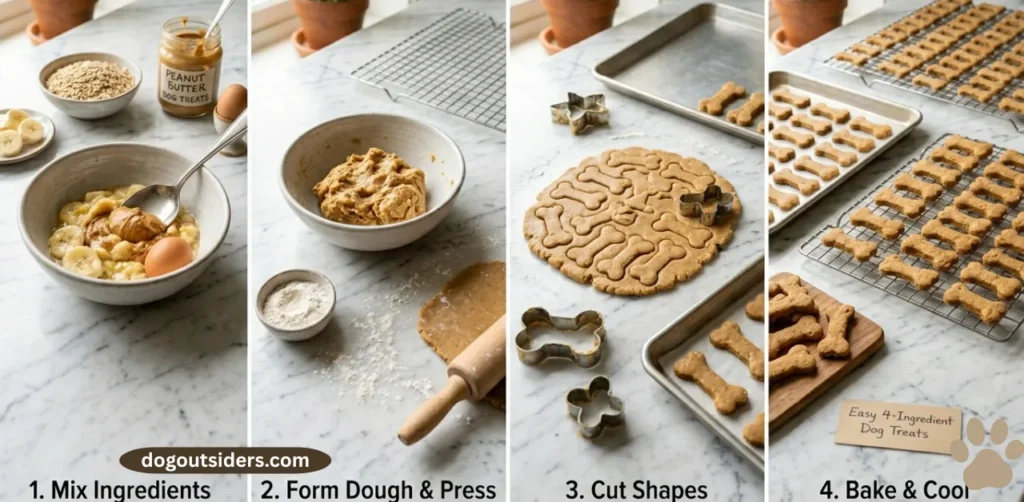
Baked Version (Step-by-Step)
- Preheat your oven to 350°F (175°C). Line a baking sheet with parchment paper.
- Mash the banana in a large bowl until smooth. No lumps needed — dogs aren’t picky.
- Add the peanut butter and egg. Mix until everything is evenly combined.
- Stir in the oats. The dough will be thick. That’s perfect.
- Roll out the dough on a lightly floured surface to about ¼ inch thickness.
- Cut into shapes using a cookie cutter or knife. Paw prints work great — but any shape is fine.
- Place on prepared baking sheet. Bake for 20–25 minutes until golden and firm.
- Cool completely before giving them to your dog. Hot treats can burn sensitive mouths.
- Store in an airtight container (see storage section below).
No-Bake Version (For When You’re Short on Time)
- Combine all four ingredients in a bowl and mix thoroughly.
- Roll into small balls (about 1 inch for medium dogs; smaller for puppies or small breeds).
- Place on a parchment-lined tray and refrigerate for at least 1 hour.
- Store in the refrigerator and use within 5 days.
Note: The no-bake version is softer and chewier — many senior dogs and puppies actually prefer this texture.
Unlike commercial dog treats (which can contain artificial preservatives and unnamed by-products), this recipe uses exactly what you see on the label. Compare that to store-bought banana bread treats and you’ll quickly see why homemade wins.
Easy Swaps and Variations for Every Dog
Every dog is different. Fortunately, this recipe is flexible. Below is a quick comparison table to help you adapt it.
| Original Ingredient | Substitution | Reason / Benefit |
|---|---|---|
| Egg | 1 tbsp ground flaxseed + 3 tbsp water | Egg allergy or vegan preference |
| Banana | ½ cup unsweetened pumpkin puree | Dogs with sensitive stomachs or banana sensitivity |
| Rolled oats | Oat flour (same quantity) | Smoother texture; easier for puppies to chew |
| Peanut butter | Sunflower seed butter | Peanut allergy (rare but possible) |
| None | Add 1 tbsp coconut oil | Shinier coat, easier-to-roll dough |
Sizing Tips by Dog Size
- Small breeds / puppies: Cut treats to ½ inch — small enough to eat quickly without choking
- Medium breeds: 1-inch rounds or standard cookie cutter shapes
- Large breeds: 2-inch rounds — they’ll still inhale them in one bite, but at least it feels generous
How to Store These Treats and How Many to Give Your Dog
Storage Checklist
- ✅ Room temperature: Up to 3 days in an airtight container
- ✅ Refrigerator: Up to 7–10 days in a sealed container
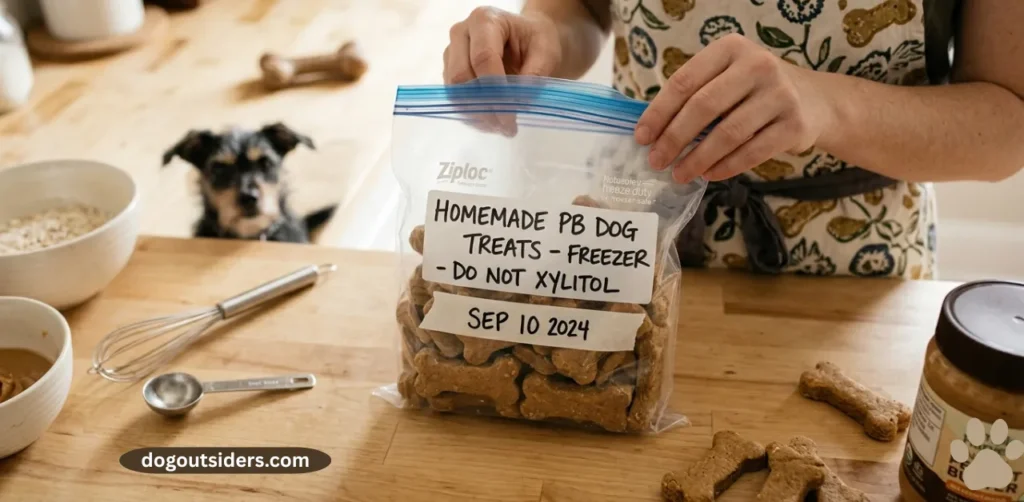
- ✅ Freezer: Up to 3 months in a zip-lock freezer bag
- ✅ Label your container with the date so you always know when they were made
- ❌ Do NOT leave treats in direct sunlight or warm areas — moisture causes mold
Pro tip: Freeze treats in a single layer first, then transfer to a bag. They won’t stick together.
Looking to add fruit variety to your dog’s routine? Find out whether dragon fruit is safe for dogs before experimenting with new treat additions.
How Many Treats Per Day?
The 10% rule applies here: treats should make up no more than 10% of your dog’s daily calorie intake. (Source: AVMA Pet Nutrition)
Approximate treat calorie count: Each biscuit contains roughly 25–40 calories (depending on size).
| Dog Size | Daily Calorie Needs (approx.) | Max Treats Per Day |
|---|---|---|
| Small (under 20 lbs) | 200–400 calories | 1–2 treats |
| Medium (20–50 lbs) | 400–900 calories | 2–4 treats |
| Large (50+ lbs) | 900–1,800 calories | 4–6 treats |
Using These Treats for Training and Enrichment
These treats aren’t just snacks — they’re tools.
For training: Break baked treats into small pea-sized pieces. Smaller rewards deliver the same motivation with far fewer calories per session. According to the Association of Professional Dog Trainers, reward-based training is most effective when treats are small, frequent, and delivered immediately after the desired behavior.
For enrichment toys:
- Stuff the no-bake version into a Kong toy before freezing — it turns into a long-lasting frozen puzzle
- Press small pieces into a lick mat for a calming mealtime activity
- Hide tiny treat pieces in a snuffle mat for nose-work enrichment
For anxious dogs: The act of licking peanut butter from an enrichment toy naturally reduces cortisol levels. It’s a simple, evidence-backed strategy that many behaviorists recommend for dogs with separation anxiety.
Common Mistakes to Avoid When Making Homemade Dog Treats
Even simple recipes have pitfalls. Here are the five most common mistakes — and how to avoid them:
- ❌ Using xylitol-containing peanut butter. This is the most dangerous mistake. Always read the full ingredient label, not just the front of the jar.
- ❌ Making treats too large for small dogs. Oversized treats are a choking risk and deliver too many calories at once.
- ❌ Skipping the cooling step. Hot biscuits can burn your dog’s mouth. Always cool to room temperature first.
- ❌ Storing treats in a warm or humid spot. Moisture encourages mold growth quickly in preservative-free treats.
- ❌ Overfeeding. Even healthy treats add calories. Stick to the 10% daily guideline to keep your dog at a healthy weight.
Make a Batch This Weekend — Your Dog Already Knows Something’s Up
Honestly, the hardest part of this recipe is stopping your dog from eating the ingredients before they’re done.
These easy 4 ingredient dog treats with peanut butter prove that caring for your dog doesn’t have to be complicated. Four ingredients. Two methods. One very happy pup.
If you found this helpful, save this article on Pinterest so other dog parents can find it too. And while you’re here, explore more dog nutrition guides on dogoutsiders.com — because great pet parenting starts with knowing what goes into every bite.
Frequently Asked Questions About Homemade Peanut Butter Dog Treats
You only need four ingredients: rolled oats, ripe banana, xylitol-free peanut butter, and one egg. That’s the complete list. No flour, no sugar, and no preservatives required. Mix, cut or roll, then bake at 350°F for 20–25 minutes. These simple ingredients are safe, nutritious, and widely available in any grocery store.
Yes — plain, xylitol-free peanut butter is safe for most dogs in moderation. The danger is xylitol, an artificial sweetener found in some brands that is toxic to dogs. Always read the full ingredient list before buying. Safe brands include Jif Natural, Adams, and 365 Whole Foods. Avoid “lite” or “diet” versions. (Source: AKC)
Combine mashed banana, peanut butter, egg, and rolled oats in a bowl until a thick dough forms. Roll to ¼-inch thickness, cut into shapes, and bake at 350°F for 20–25 minutes. For a no-bake version, roll into balls and refrigerate for one hour. No special equipment is needed — just a bowl and a baking sheet.
Yes, puppies can eat these treats in small amounts. Cut or shape the treats very small — no larger than a fingernail for tiny breeds. Use plain, xylitol-free peanut butter only. Because puppies have sensitive digestive systems, introduce new treats gradually. Start with one small piece and monitor for any digestive reaction before offering more.
Homemade peanut butter dog treats last 3 days at room temperature in an airtight container, 7–10 days in the refrigerator, and up to 3 months in the freezer. Because they contain no artificial preservatives, they spoil faster than commercial treats. Always label containers with the date made and discard any treat that smells off or shows mold.
No — a no-bake version works perfectly. Roll the dough into small balls, place on a parchment-lined tray, and refrigerate for at least one hour until firm. The texture will be softer and chewier than baked biscuits, which many puppies and senior dogs actually prefer. Store no-bake treats in the refrigerator and use within five days.
Yes, these treats freeze very well. Lay them flat on a parchment-lined tray and freeze for two hours before transferring to a labeled freezer bag. This prevents them from sticking together. Frozen treats last up to three months and make excellent cool summer snacks. Thaw individual treats at room temperature for 10–15 minutes before serving.